To change the cabin air filter in a Honda Pilot, push both tabs in at the same time, wiggle it back and forth, and slide it out. Are you looking to change the cabin air filter in your Honda Pilot?
Regularly changing the cabin air filter is essential for maintaining clean air inside your vehicle. In this guide, we will provide you with step-by-step instructions to help you change the cabin air filter in your Honda Pilot, ensuring that you and your passengers breathe fresh, clean air while on the road.
By following these simple steps, you can keep your cabin air filter in optimal condition and enjoy better air quality in your Honda Pilot. So, let’s get started and learn how to change the cabin air filter in a Honda Pilot.

Credit: m.youtube.com
Locating The Cabin Air Filter
Locating the Cabin Air Filter:
In Honda Pilot
Ensuring your cabin air filter is clean and functioning properly is essential for a comfortable driving experience in your Honda Pilot.
Step-by-step Guide
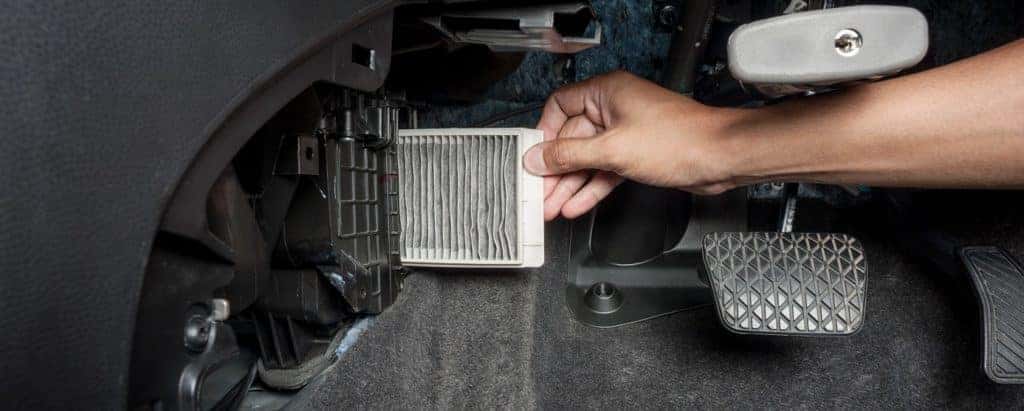
- Start by locating the cabin air filter housing under the dashboard on the passenger side of your Honda Pilot.
- Remove any cover or panel that is obstructing access to the cabin air filter.
- Inspect the filter housing carefully to identify the latch or tabs that secure the filter in place.
- Press the tabs or release the latch to open the housing and reveal the cabin air filter inside.
- Before removing the old cabin air filter, take note of its orientation to ensure the new filter is installed correctly.
The cabin air filter in your Honda Pilot plays a crucial role in maintaining clean air inside the vehicle, so regular inspection and replacement are recommended.
Credit: www.hondaofbaycounty.com
Preparing For Replacement
For Honda Pilot owners, changing the cabin air filter is essential for maintaining clean air in the vehicle. By following simple step-by-step instructions, you can easily replace the old filter with a new one. This process can improve the air quality inside the car and ensure a healthier driving environment.
Tools And Materials Required
- Phillips screwdriver
- Cabin air filter
- Vacuum cleaner with attachment
Safety Precautions
- Ensure engine is turned off
- Wear gloves to protect hands
- Avoid inhaling dust particles
Now that you have gathered the necessary tools and materials and understand the safety precautions, you are ready to begin the process of changing the cabin air filter in your Honda Pilot.
First, locate the cabin air filter housing in your vehicle. This is typically found behind the glove compartment or under the dashboard.
Before proceeding, ensure that the engine is turned off to prevent any accidents. You should also wear protective gloves to keep your hands clean during the replacement process.
Next, use a Phillips screwdriver to remove any screws or fasteners securing the cabin air filter housing. Once the housing is accessible, carefully open it to reveal the old cabin air filter.
Using a vacuum cleaner with an attachment, gently clean out any debris or dust accumulated in the filter compartment. This will help ensure that the new cabin air filter functions effectively.
With the compartment cleaned, carefully remove the old cabin air filter and dispose of it properly. Take your new cabin air filter and insert it into the housing, making sure it is positioned correctly.
Once the new filter is securely in place, reassemble the cabin air filter housing by tightening the screws or fasteners. Double-check that everything is properly sealed to prevent any air leaks.
Finally, start your Honda Pilot to test the new cabin air filter. Enjoy the improved air quality inside your vehicle with a fresh cabin air filter.
Removing The Old Filter
Before you can install a new cabin air filter in your Honda Pilot, you must remove the old one. This process involves accessing the filter compartment and then properly disposing of the old filter.
Accessing The Filter Compartment
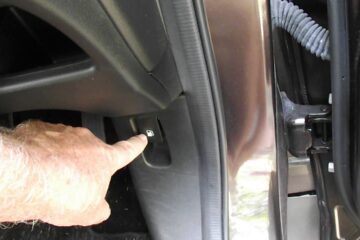
First, open the glove box and remove any items stored inside. Push in the sides of the glove box to release the stops, allowing it to swing down and out of the way. Now, you can access the filter compartment behind the glove box. Typically, there are tabs or clips that secure the cover of the filter compartment, so gently release them to expose the old filter.
Proper Disposal
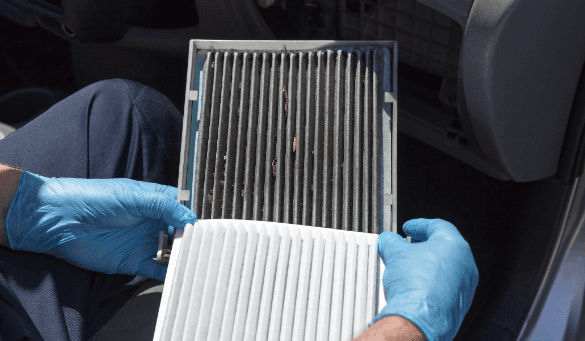
Once you have removed the old cabin air filter, it’s important to dispose of it properly. Do not simply throw it in the trash, as cabin air filters can contain contaminants that may be harmful to the environment. Check with your local waste management facility to find out the correct disposal method for your old filter. Most auto parts stores also accept used cabin air filters for proper disposal.
Credit: www.hillsidehonda.com
Installing The New Filter
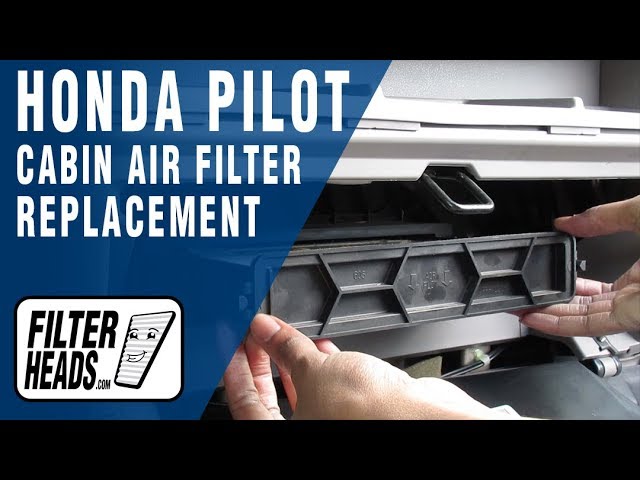
To change the cabin air filter in your Honda Pilot, start by pushing both of the tabs in at the same time. Then, wiggle the filter while keeping the tabs pushed in until it slides out. Finally, install the new filter in its place.
Alignment And Positioning
When it comes to installing the new cabin air filter in your Honda Pilot, proper alignment and positioning are crucial. Follow these steps to ensure that the filter is installed correctly:
- Step 1: Locate the filter compartment in your Honda Pilot. It is typically located behind the glove box.
- Step 2: Align the new cabin air filter with the arrows or markings on the filter compartment. This will ensure that the air flows through the filter properly.
- Step 3: Carefully slide the filter into the compartment, making sure it is aligned and positioned correctly.
- Step 4: Gently push the filter all the way in until it is fully seated in the compartment.
Securing The Compartment
To complete the installation of the new cabin air filter, you need to secure the filter compartment. Follow these steps to ensure that the compartment is securely closed:
- Step 1: Gently close the filter compartment door or cover.
- Step 2: Press on the door or cover to make sure it is securely latched.
- Step 3: Give the compartment a gentle tap to ensure it is fully closed and there are no loose parts.
Following these alignment and securing steps is essential to ensure that the new cabin air filter is properly installed in your Honda Pilot. Taking the time to align the filter correctly and secure the compartment will help ensure optimal air quality inside your vehicle.
Post Installation Checks
Learn how to change the cabin air filter in your Honda Pilot with these easy post-installation checks. Follow the step-by-step instructions to ensure your air filter is properly installed and functioning, keeping the air in your cabin clean and fresh.
Testing The Airflow
After changing the cabin air filter of your Honda Pilot, it’s crucial to test the airflow to ensure optimal performance.
Ensuring Proper Fit
Double-check the installation to guarantee that the new air filter fits snugly and securely in place.
Benefits Of Regular Replacement
Changing your Honda Pilot’s cabin air filter regularly provides significant advantages, ensuring optimal performance of the vehicle’s HVAC system and enhancing air quality inside the cabin.
Improved Air Quality
Regular replacement of the cabin air filter in your Honda Pilot eliminates dust, pollen, and other harmful particles from entering the vehicle’s interior.
- Reduces allergens and pollutants to create a healthier breathing environment
- Prevents musty odors and mold buildup inside the cabin
Enhanced Hvac System Performance
A new cabin air filter ensures the HVAC system in your Honda Pilot operates at peak efficiency, delivering optimal heating and cooling performance.
- Improves airflow and ventilation throughout the cabin
- Preserves the longevity of the HVAC components by reducing strain
Regularly replacing the cabin air filter not only benefits your health but also enhances the overall driving experience by maintaining a clean and comfortable interior environment.
Frequently Asked Questions
How Often Should I Change The Cabin Air Filter On My Honda Pilot?
You should change the cabin air filter on your Honda Pilot every 15,000-30,000 miles or as recommended in the owner’s manual to maintain clean air in the cabin. Regular changes enhance air quality and HVAC system efficiency.
Can I Replace My Cabin Air Filter Myself?
Yes, you can replace your cabin air filter yourself. It is a simple DIY task.
How Often Should I Change My Honda Cabin Air Filter?
You should change the Honda cabin air filter every 15,000 to 30,000 miles for optimal performance.
What Happens If I Don’t Change The Cabin Air Filter?
Not changing the cabin air filter can lead to pollen entering the vehicle and causing sneezing or other allergies. It can also make the HVAC system work harder, potentially causing damage to the motor.
Conclusion
Changing your Honda Pilot’s cabin air filter is a simple yet vital maintenance task. By following the steps outlined in this guide, you can ensure better air quality inside your vehicle and improve the efficiency of your HVAC system. Regularly replacing the cabin air filter can benefit both you and your car.


[…] Installing a performance air filter […]